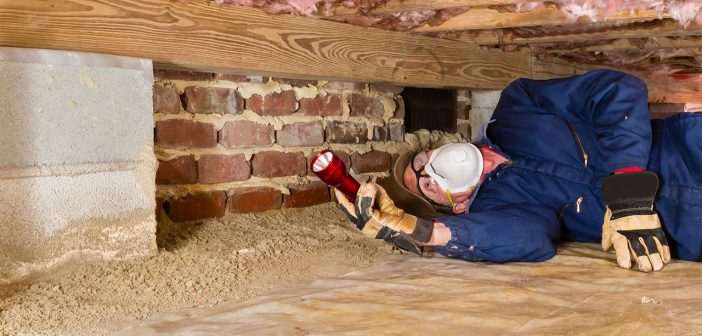
If your house has several crawlspaces, mold growth could be a concern. There is nothing to worry about because molds are common in high humid, dark, damp, and scarcely ventilated area or climatic conditions. An undetected pipe burst, water damage, and leakage can also cause molds to grow on the walls, upholsteries, carpets, floorboards, crawl space, etc.
Finding crawlspace mold may take longer than usual because we don’t go there very often. However, if your house develops a musty smell and you haven’t found the source after looking everywhere, it could probably be released from the crawl space. A simple peek would confirm your doubts.
Steps to Remove Mold from Crawlspace
Molds in crawlspace do not require expert consultation. You can manage the problem yourself. Staying calm and acting on your reflexes should be your first step.
Inspect the Space
You should start by inspecting the space. Light one or two lamps to provide extra lighting for the process. Inspecting the space will help you determine the time it would take to clean and sanitize the surface. Wear coveralls, respiratory masks, and gloves before coming in contact with the mold. Molds are one of the widespread home-based airborne funguses, which can cause allergic reactions and respiratory problems in children and older adults. Therefore, you must take precautions.
Start Pre-Process
Remove all the items surrounding the area so that cleaning becomes easy. Also, place two to three table fans to dehumidify and ventilate the space. You can either prepare your own DIY cleaning solution using vinegar and water or baking soda and water or buy a good quality mold cleanser from local store. Store brought solutions are a good readymade option for they not only kill the microbes but also remove stains from the wall. Moreover, they are hassle-free and cheaper than calling-in expert cleaners.
Clean the Place using Disinfectant
Store-brought sprays come in two forms – foaming sprays that expand and loosen the molds or and chemical solutions that saturate the area. Both are effective in killing the mold, but you have to scrape the surface to clean it. Use a stiff scrubber to scrub the surface thoroughly. Before cleaning, place a plastic cover or newspaper below the surface to accumulate the scrapped mold.
Dispose of the plastic sheet, the gears you wore, and the tools you used to clean the area.
After Cleaning Precautions
Place a UV lamp near the area and let it glow for 24 hours so as to kill last spores if there is any clinging to the wall. This will also help you dry out extra moisture that the chemical spray left behind. Let air circulate for a day before you start reusing the area.
When to Hire Professionals
If this is your first experience with mold, then the process may seem complex and lengthy. If you aren’t sure about how to do it, you can consult a licensed mold damage removal company. Usually, water damage restoration companies provide mold remediation services as well because sometimes mold growth is a side effect of water damage. So, you can contact them as well if you do not find a mold damage specialist in your city.
Hiring a mold specialist is a great idea because:
- They ensure that the spores don’t spread further.
- They prevent future growth by ensuring there is no leftover mold.
- They inspect the mold type before removal and based on it, use the right technique, equipment, and approach.
- They can dispose of waste better than you.
- They also provide annual scheduled maintenance services.
Remember to consult a mold damage remediation expert if the mold doesn’t go away with DIY process or it has spread to a large surface. Since it is time-consuming, an expert team will be able to do the work quickly and efficiently.


