

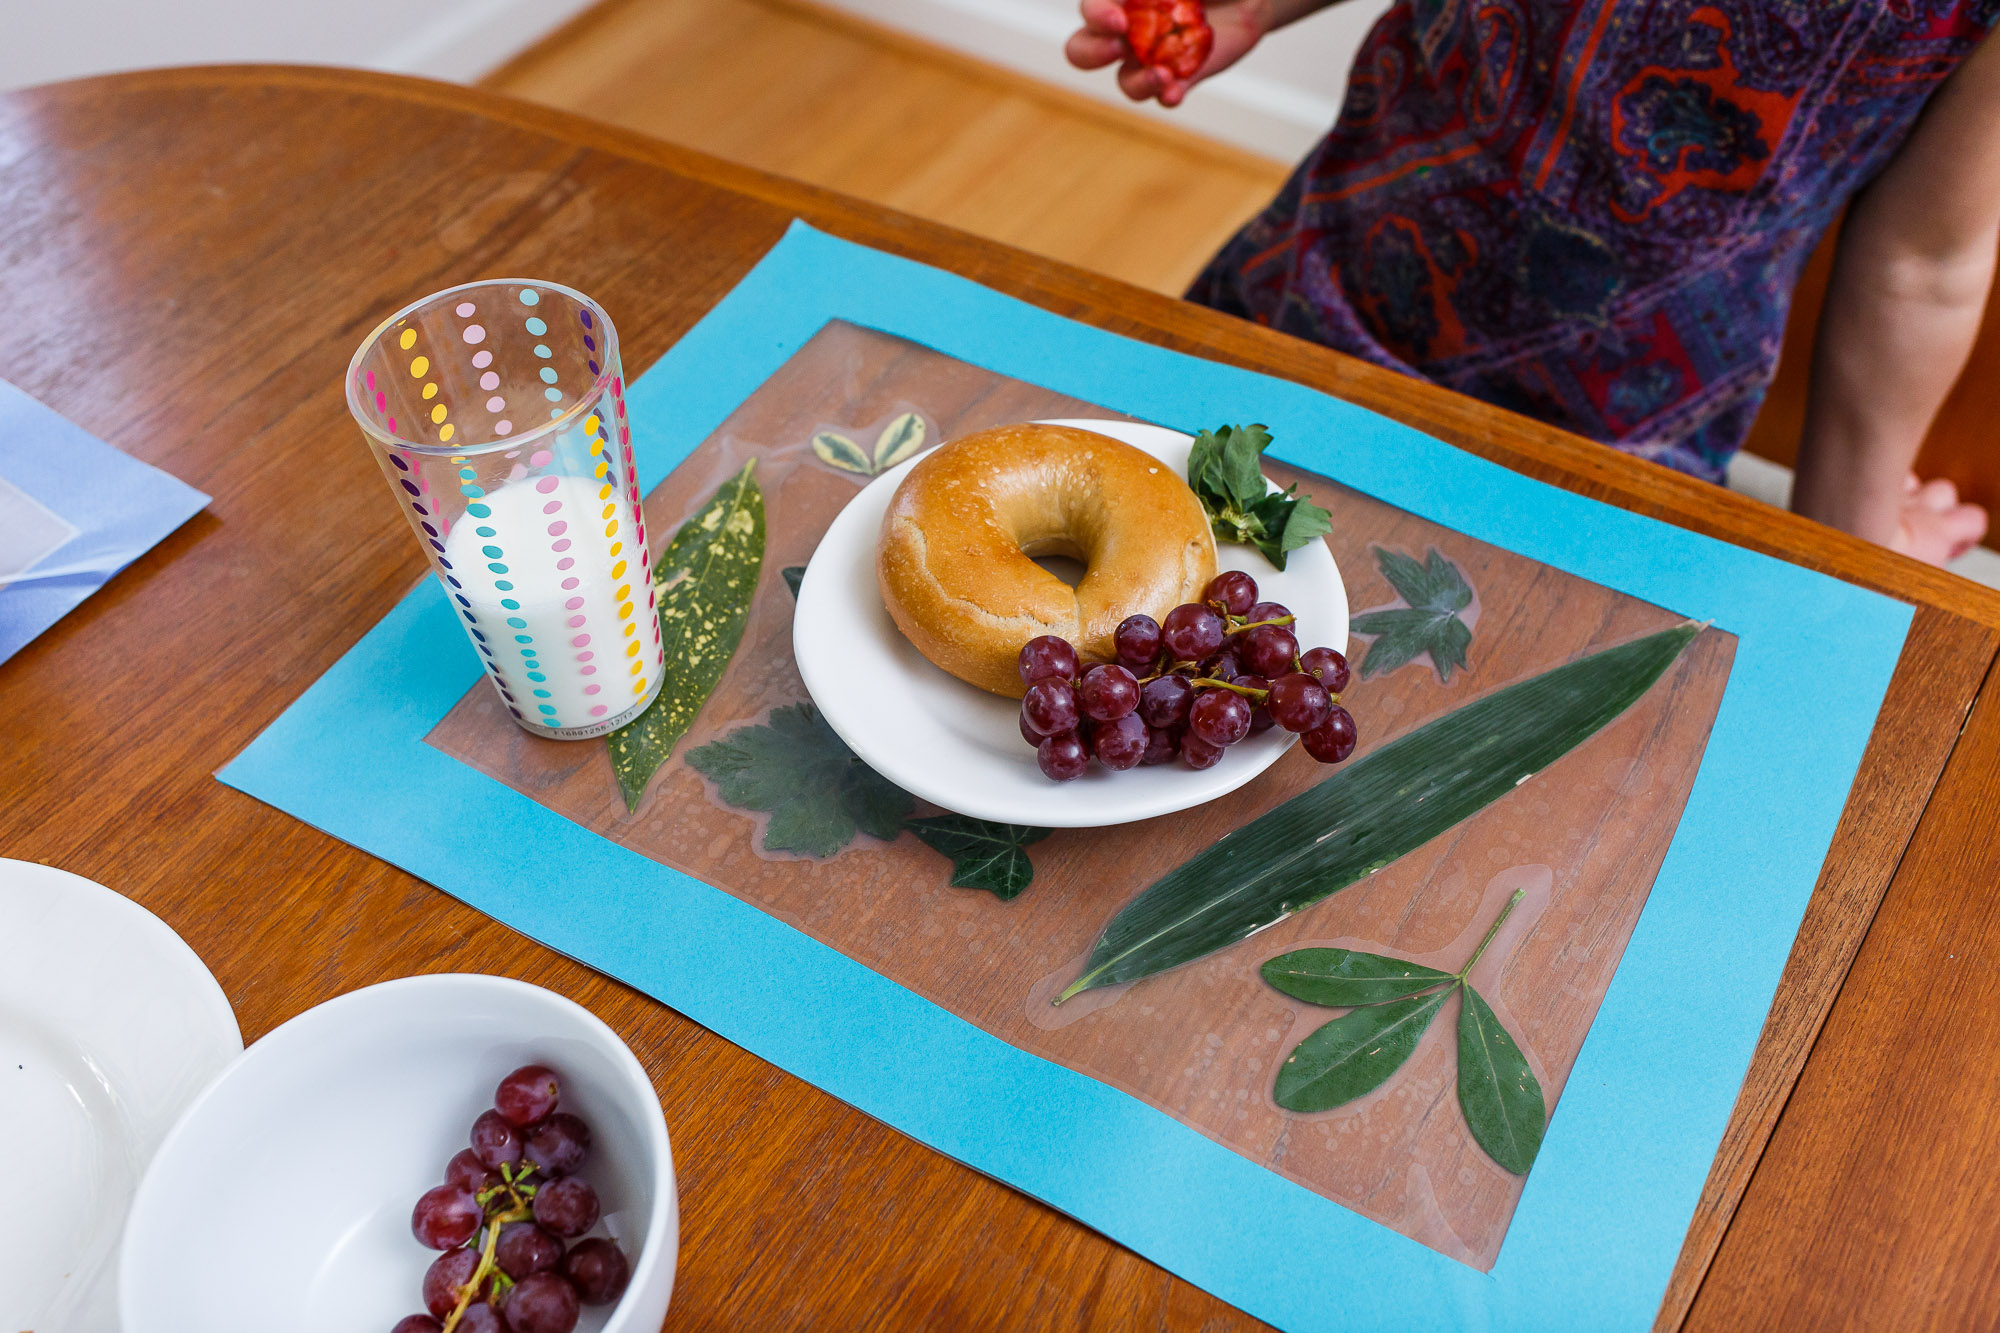
Meals are even more fun when you eat on place mats created by your kids. Making them at home is a super easy project that takes less than an hour to complete!
Whether you’re planning for a big dinner party or simply thinking of your many family meals together ahead, break out this fun activity so that your child feels like she is an important part of the process. Using contact paper, construction paper, and a little help from Mother Nature, these homemade place mats add a wonderful note of spring joy to the table.
What You Will Need:
- Clear contact paper
- 12-in x 18-in construction paper (or any other larger size)
- Flower petals in various colors
- Leaves in various shapes and sizes
Directions:
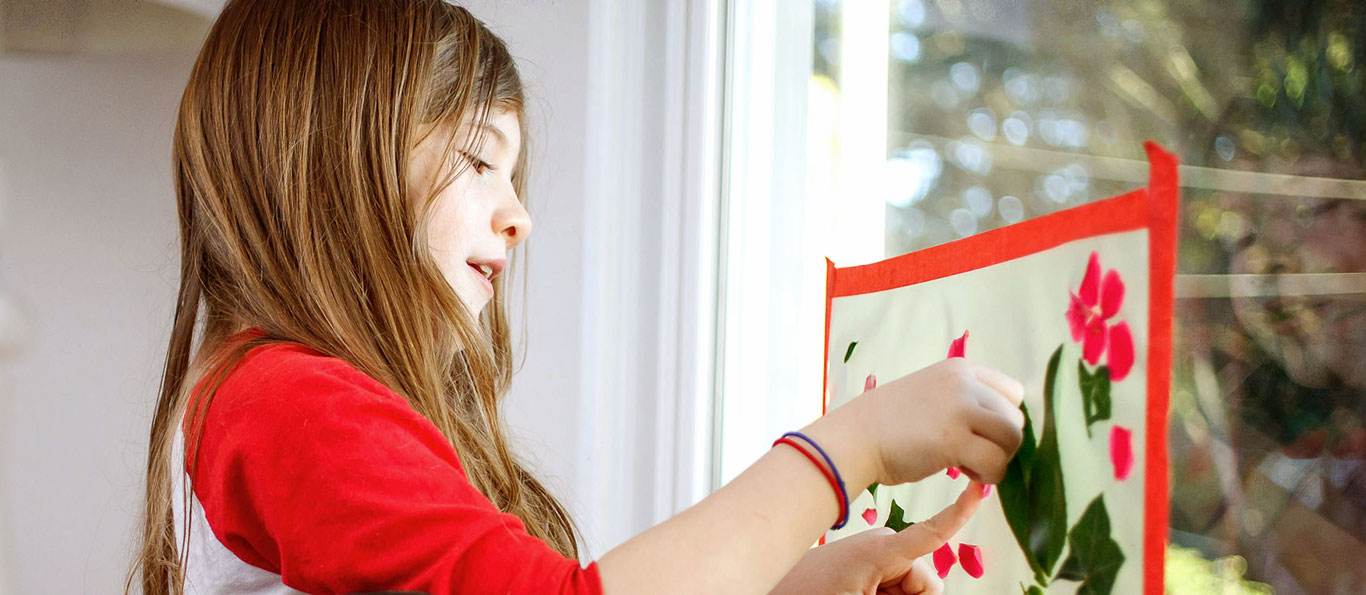
- Hunt for natural objects that can be easily flattened like flower petals and leaves
- Create the frames by cutting a rectangle out of the center of each piece of construction paper so that a ½ inch border remains
- Place one sheet of contact paper over a frame and set the combined piece on the table, sticky side up
- Encourage your child to design their place mat by artfully arranging the petals and leaves onto the sticky contact paper
- Place the second sheet of contact paper face down to seal in the petals and leaves

Pro-tip: The flatter the items, the fewer air pockets you’ll have in the end. When laying down the second sheet of contact paper, work from one edge to the other, slowly pressing it down so you can work out air bubbles as you go
Our favorite part of creating these place mats is finding the perfect flower petals, leaves, and stalks of grass to showcase. Feeling rustic? Gather some wheat if available. Want to host a tea party for forest fairies? Pick some large green leaves.
Connect with KinderCare Learning Centers: Visit | Facebook | Twitter


